Configuring the Broadcasting Schedule
Configuring the Broadcasting Schedule
This article explains how to configure when a playlist plays: the active date range, the days of the week, and the daily broadcasting hours.
Date range and daily hours
The schedule uses two different time settings that work together. The Broadcast Period defines on which dates the playlist is active - it is a date range with a start and an end. The Broadcasting Hours define at what time of day the playlist plays within that range - a daily window that repeats on every active day. A playlist plays only when all conditions match: the current date falls inside the broadcast period, the current day of the week is selected, and the current time is inside the broadcasting hours.
Each playlist has a status derived from its broadcast period: Active (playlists that are currently within their broadcast period and scheduled to play), Expired (playlists whose broadcast period has ended), and Expiring soon (playlists that are approaching the end of their broadcast period). The status is shown in the Playlists list and can be used as a filter.
The Playback Schedule section
The schedule is configured in the Playback Schedule section of the playlist form. To open it, go to Playlists, then click New playlist or open an existing playlist for editing.
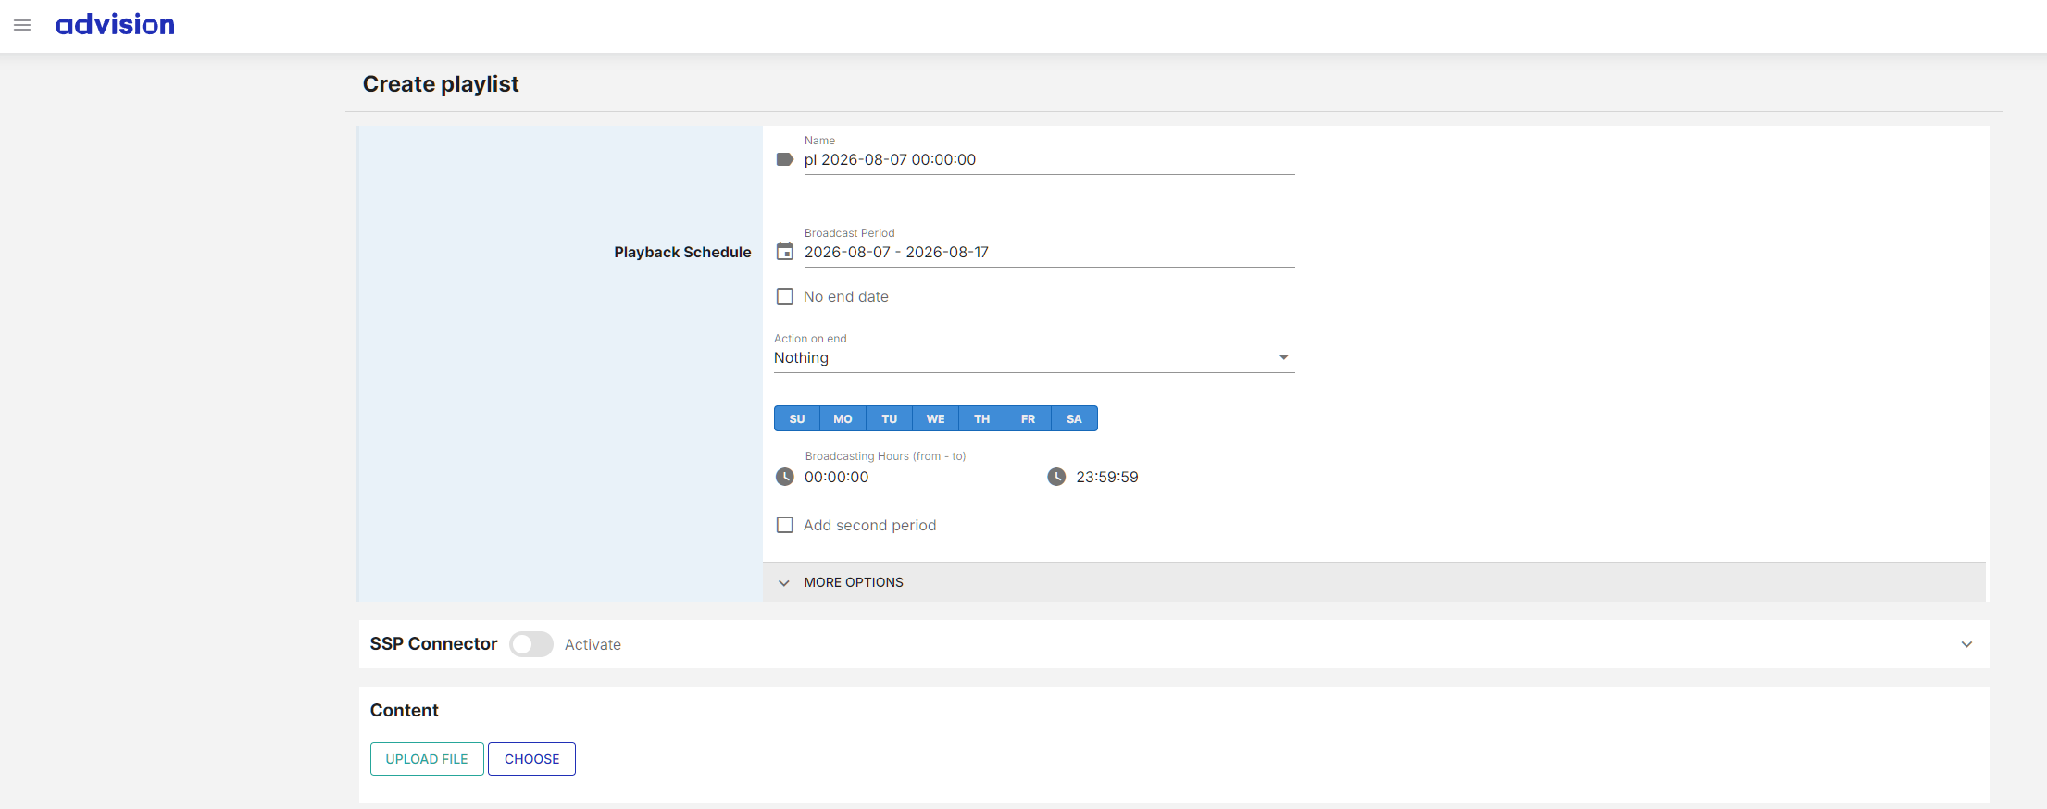
The Playback Schedule section of the playlist form.
The Playback Schedule section defines when the playlist is active.
Configuring the schedule step by step
Step 1. Set the date range. The Broadcast Period field sets the date range during which the playlist is active. It contains a start date and an end date. The playlist will only be included in the schedule on days that fall within this period.
Step 2. To run the playlist without an end date, check the No end date checkbox. When this checkbox is checked, the end date field is removed and the Broadcast Period is replaced by a Start date field only. The playlist will then run without a set end date, starting from the specified start date and continuing until it is manually stopped or edited.
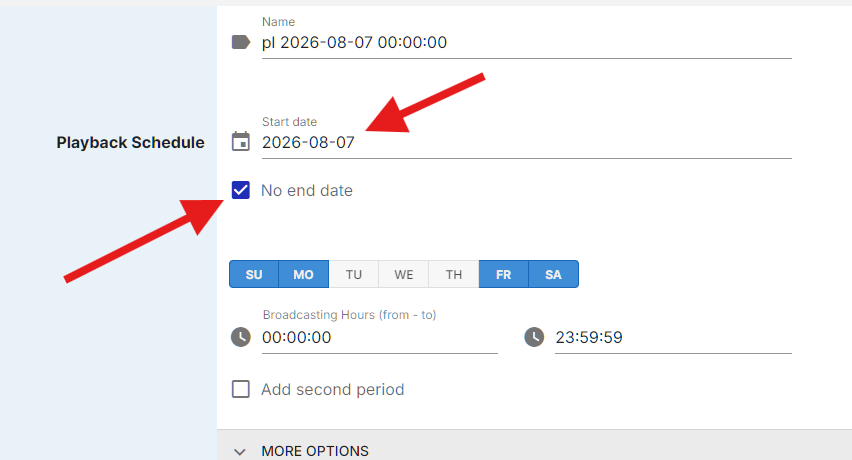
No end date checked: only the Start date remains.
Step 3. Choose what happens when the period ends. When the No end date checkbox is not checked and a specific end date is set, an Action on end dropdown appears below the Broadcast Period. This dropdown defines what the platform does when the broadcast period ends. Three options are available: Nothing, Detach, and Delete. The default value is "Nothing."
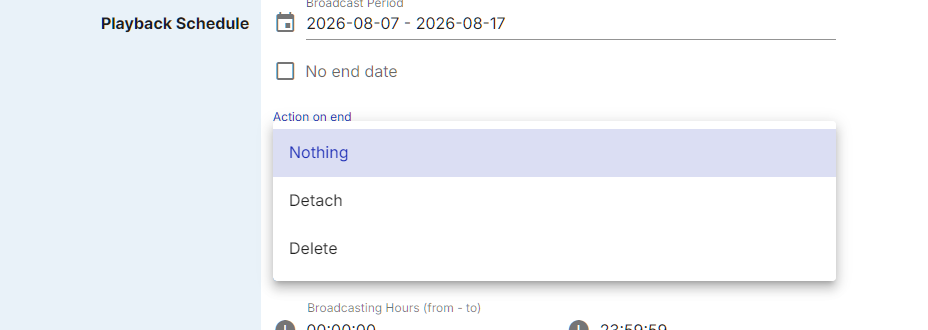
The Action on end options.
The First day start at and Last day end at fields below Action on end set the time boundaries for the first and the last day of the broadcast period.
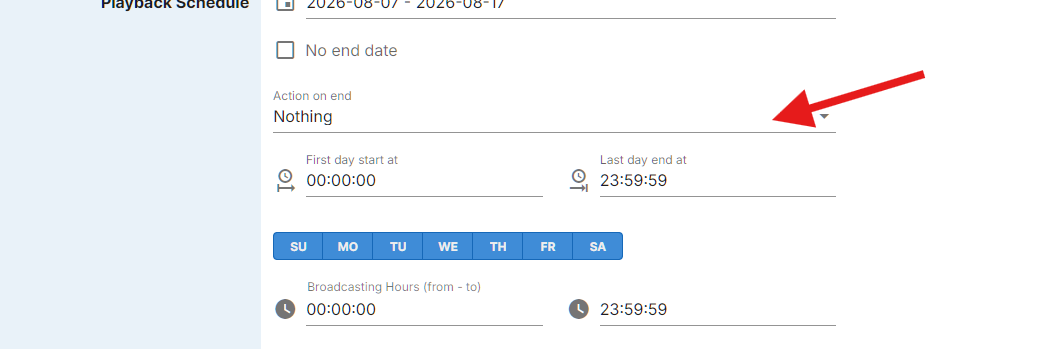
The First day start at and Last day end at fields.
Step 4. Select the days of the week. The days of week buttons (SU, MO, TU, WE, TH, FR, SA) define on which days within the broadcast period the playlist is active. Selected days are highlighted in blue. By default, all seven days are selected. Click any day button to toggle it on or off. On days that are not selected, the playlist will not play even if they fall within the broadcast period.
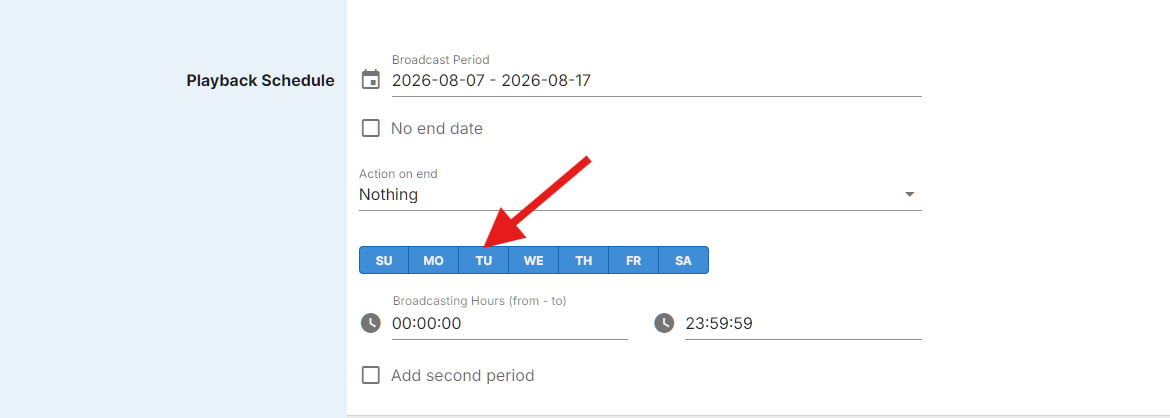
Clicking a day button.
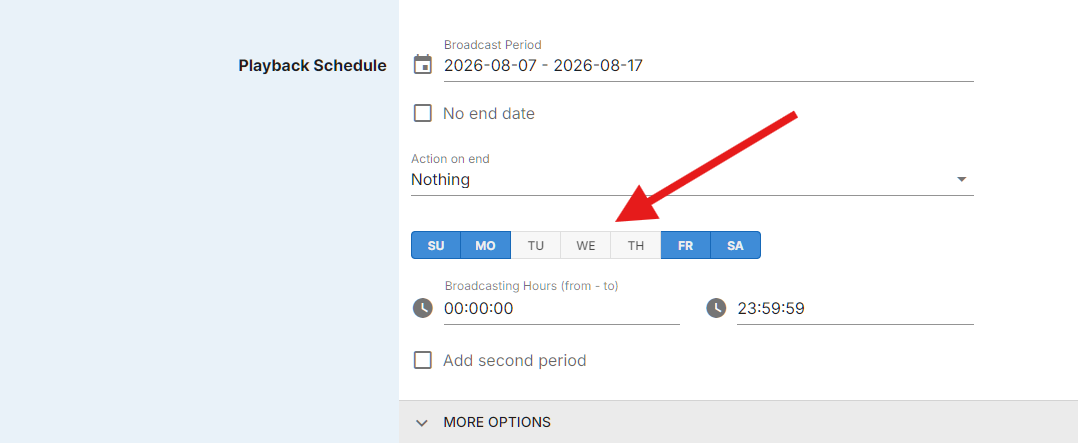
Deselected days.
Step 5. Set the daily time window. The Broadcasting Hours (from - to) fields set the daily time window during which the playlist plays. The "from" field defines the start time and the "to" field defines the end time, both in HH:MM:SS format. For example, setting 08:00:00 to 23:00:00 means the playlist will only be scheduled between 8 AM and 11 PM each active day. Click the from or the to field - a clock face opens. Drag the round handle to set the time.
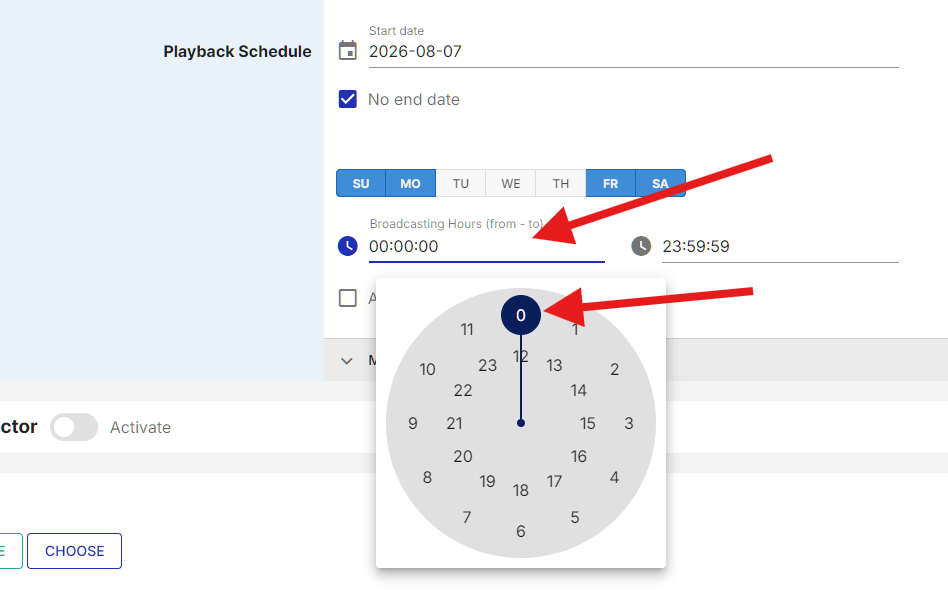
The clock face for the from field.
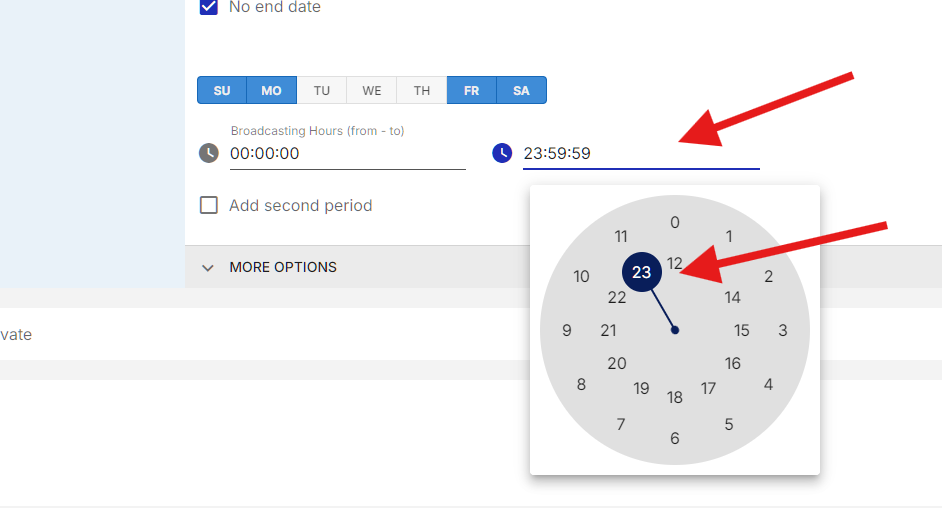
The clock face for the to field.
Step 6. Add a second daily window if needed. The Add second period checkbox, when checked, adds a second pair of Broadcasting Hours fields. This is useful when the playlist needs to play during two separate time windows within the same day, for example from 08:00:00 to 12:00:00 and then again from 18:00:00 to 23:00:00. The second pair of fields, Broadcasting Hours Second Period (from - to), uses the same clock face.
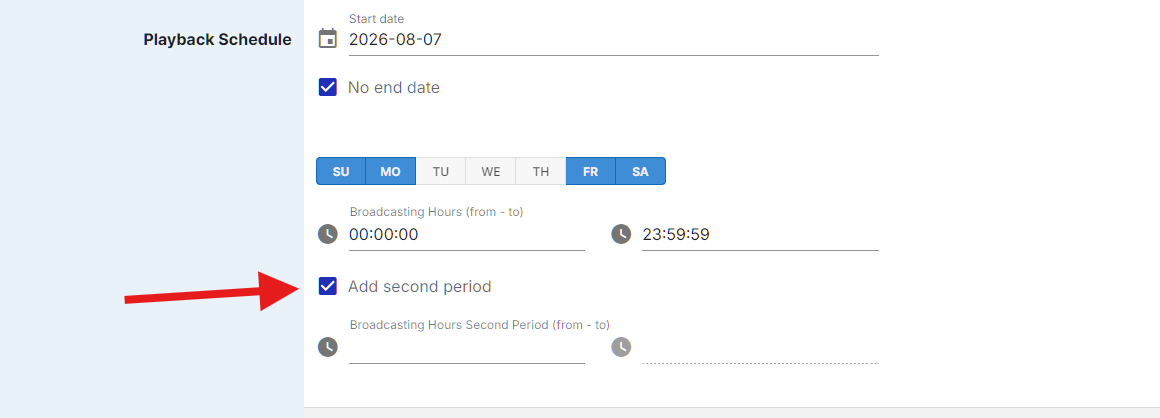
The second broadcasting period fields.
What plays outside the broadcasting hours
The fallback content for the gaps is set on the device page, in the All-Day Content section at the top of the Content tab. This is the content that plays on the device when no playlist is currently scheduled. If no playlists are active at a given time (for example, outside of all playlist broadcasting hours), the device displays whatever file is set as All-Day Content. When no file has been assigned, the section shows the text "Not set".
How the platform builds the schedule
After uploading, the user creates playlists and configures their playback settings. Each playlist has a type (Fuzzy, Periodic, Block, Loop Item, or Floating) that determines how files are rotated. The user sets the broadcast period (start and end dates), days of the week, daily broadcasting hours, and optionally a second broadcasting period within the same day. Advanced options include content distribution type, file playback order (straight, reverse, random, or one of), quantitative restrictions, and per-file schedule overrides for individual media within the playlist.
Once the user saves the playlist and the assignment is in place, the platform aggregates all playlist settings for each device. The system evaluates every assigned playlist - its type, file durations, content formats, schedule parameters, and priority - and builds a per-second playback schedule for each content zone on each device. The result of this calculation can be reviewed in the Schedule tab of the device page, where the operator can see exactly which file will play at which second throughout the day.
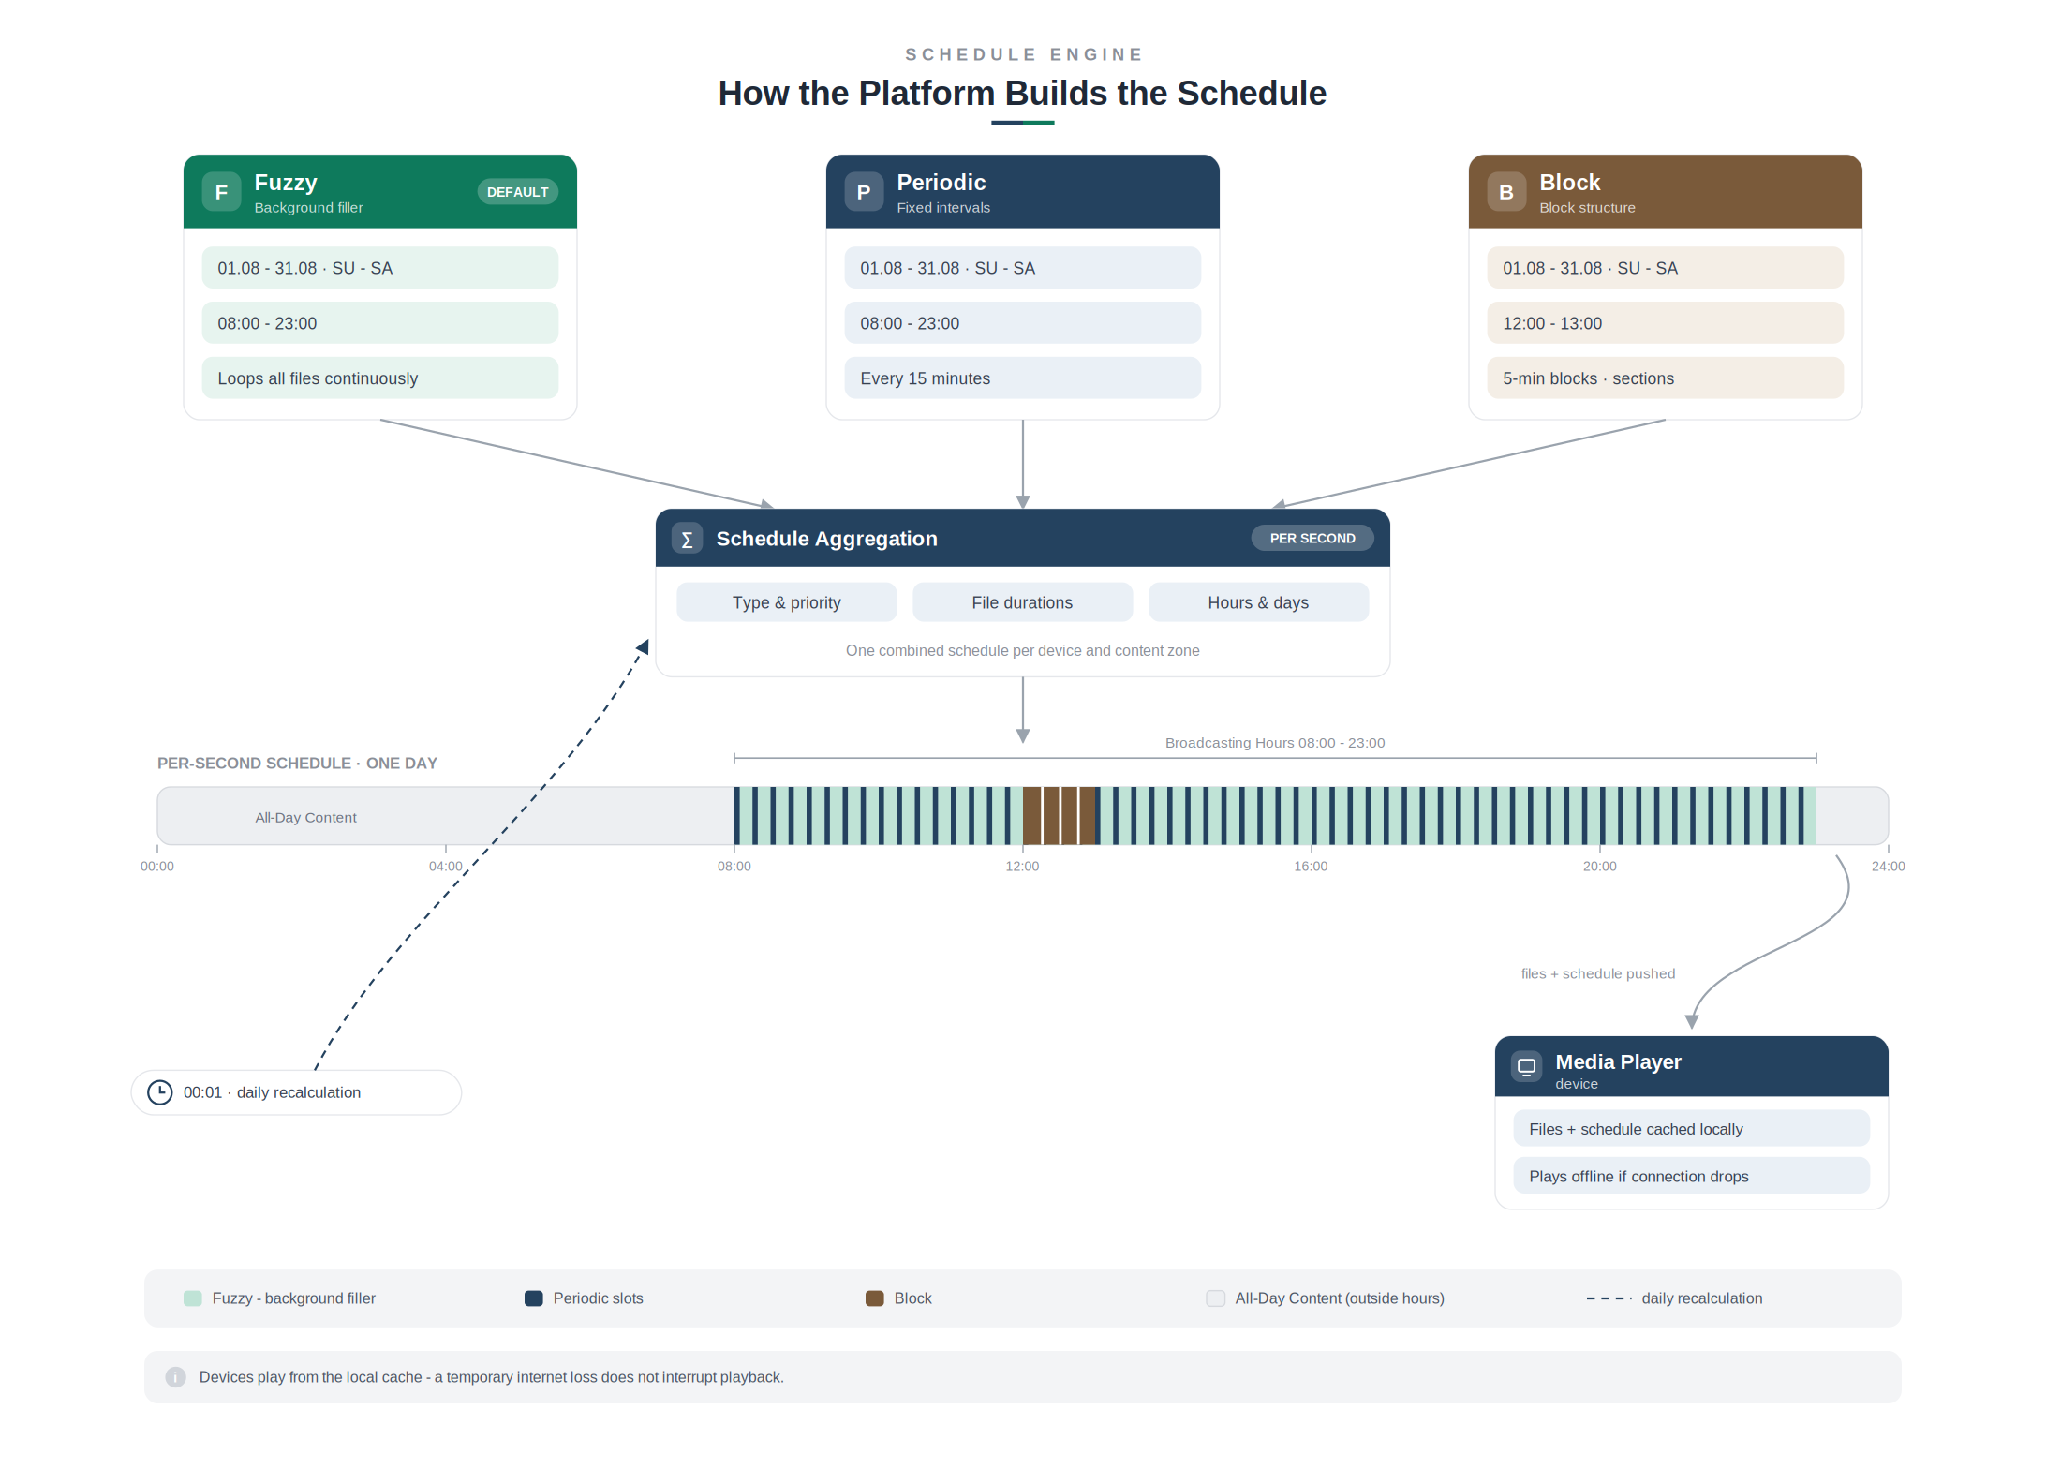
From playlist settings to a per-second device schedule.
At 00:01 each day, the system recalculates the schedule and transitions to the next day’s schedule - see the article "Content Update Modes: Active vs Passive" for how this affects when saved changes take effect.
The platform then pushes the content files and the calculated schedule to the physical devices over the internet. Devices download and cache all files and schedules in local memory. From this point, the player application on the device plays content from its local storage according to the schedule, without requiring a continuous connection to the server. If the internet connection is temporarily lost, cached content continues to play without interruption.
Device timezone
To set the device timezone, open the device page and switch to the Settings tab. The Timezone dropdown selector defines the timezone for this device. Click the dropdown to open a list of available timezones and select the one that matches the physical location of the device. All playlist broadcasting hours and broadcast periods for this device are calculated according to the timezone set here.
What's next
To create a playlist from scratch, see the article "Creating and Configuring a Basic Playlist". To learn how playlist types share the airtime inside the broadcasting hours, see "Playlist Types and Priorities".