Registering and Connecting the First Screen
Registering and Connecting the First Screen
This article explains how to bind a physical media player (screen) to your Advision account.
Before you start
Before adding a device to the platform, the Advision Player application must be installed on the physical device. The exact installation procedure depends on the platform - for step-by-step instructions, refer to the installation guide for your platform:
Raspberry Pi 4 - OS image flashing
Android TV / Google TV - APK installation
Standard Android devices - player setup
Samsung Android devices - player setup
iNEXT media player - hardware connection to a TV before software setup
The Advision media player is a dedicated hardware device developed by Advision with pre-installed software. It connects to any screen or audio equipment via HDMI. Setup takes three steps: connect HDMI to the screen, connect power and internet, then upload content and press Play in the admin panel. The device appears online in 5-10 seconds after powering on.
How the pairing code appears
After the player application is installed and launched on the device, a 6-digit pairing code appears on the screen. On some devices, a QR code is also displayed alongside the numeric code.
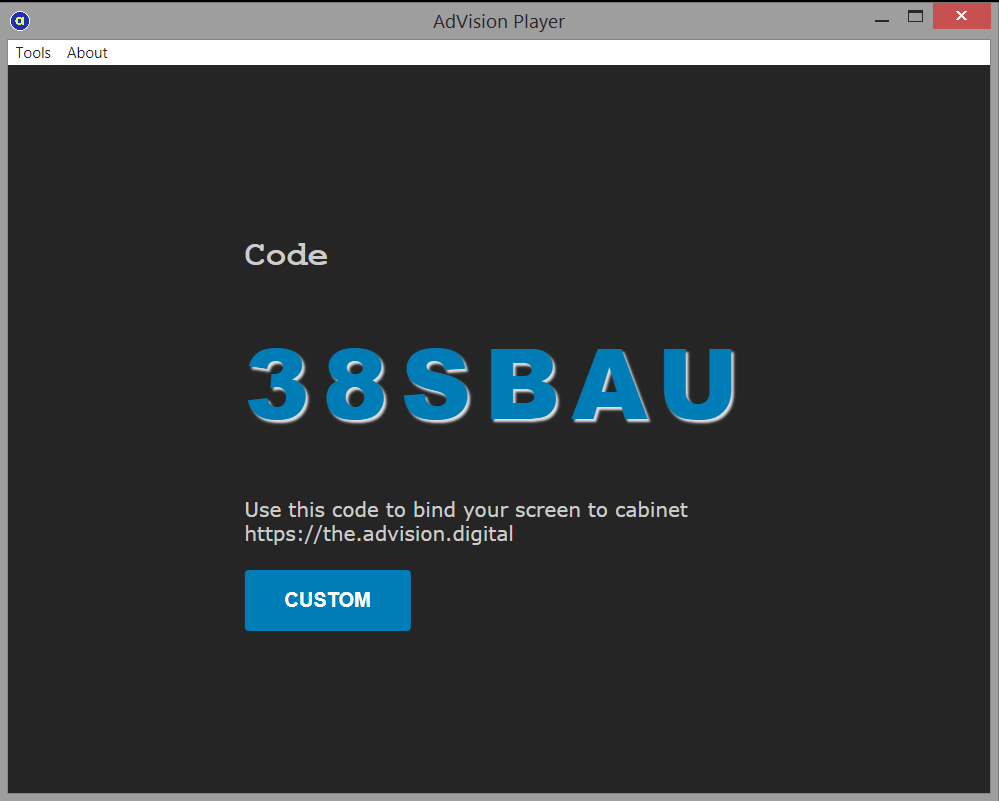
The pairing code on the desktop version of the Advision Player.
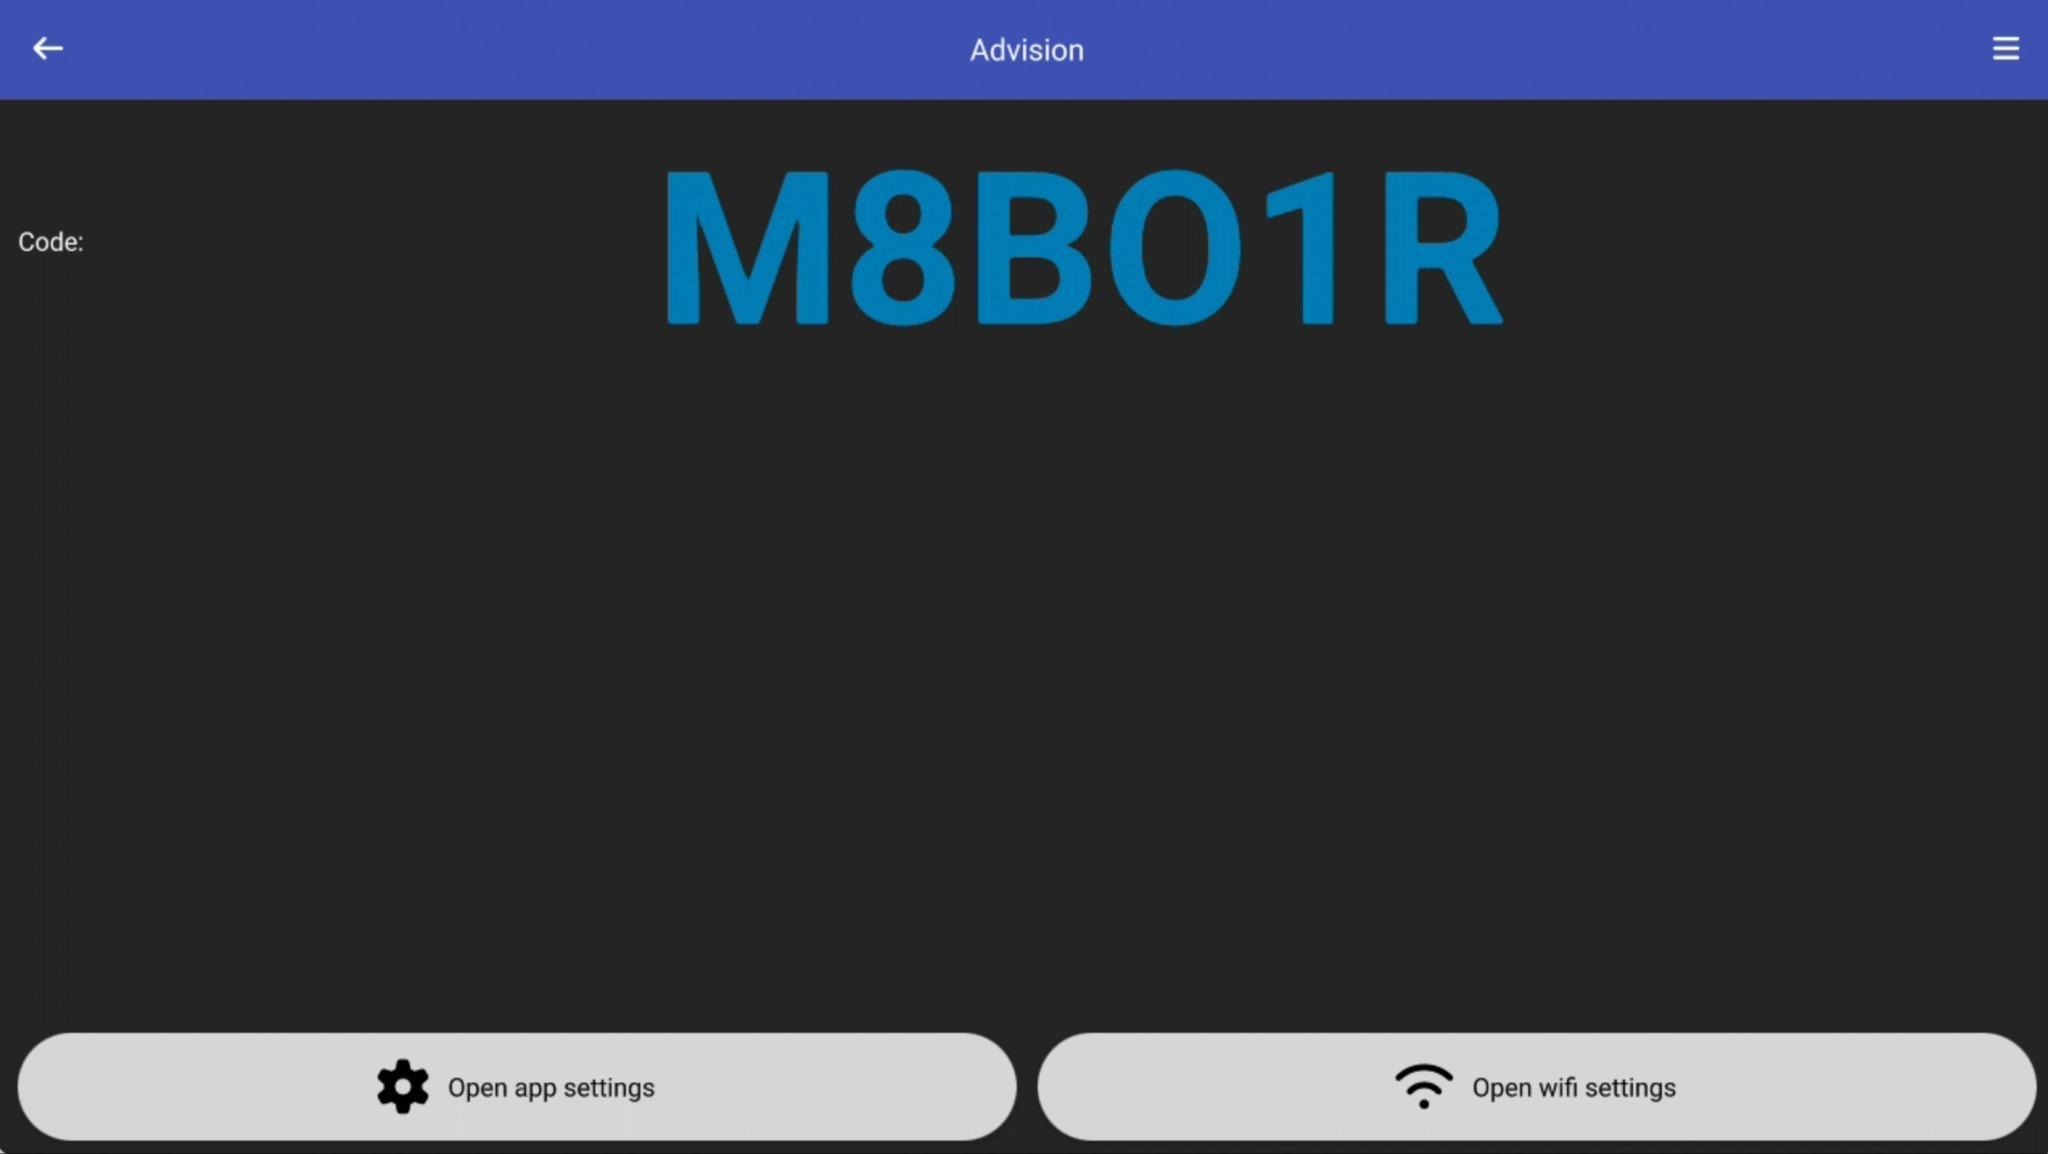
The pairing code on the Android version of the Advision Player.
Setting up a new screen from the Dashboard
On the Dashboard, the plus button on the Devices card opens the Set up a new screen wizard, which combines both parts of the process: downloading the player application and entering the pairing code.
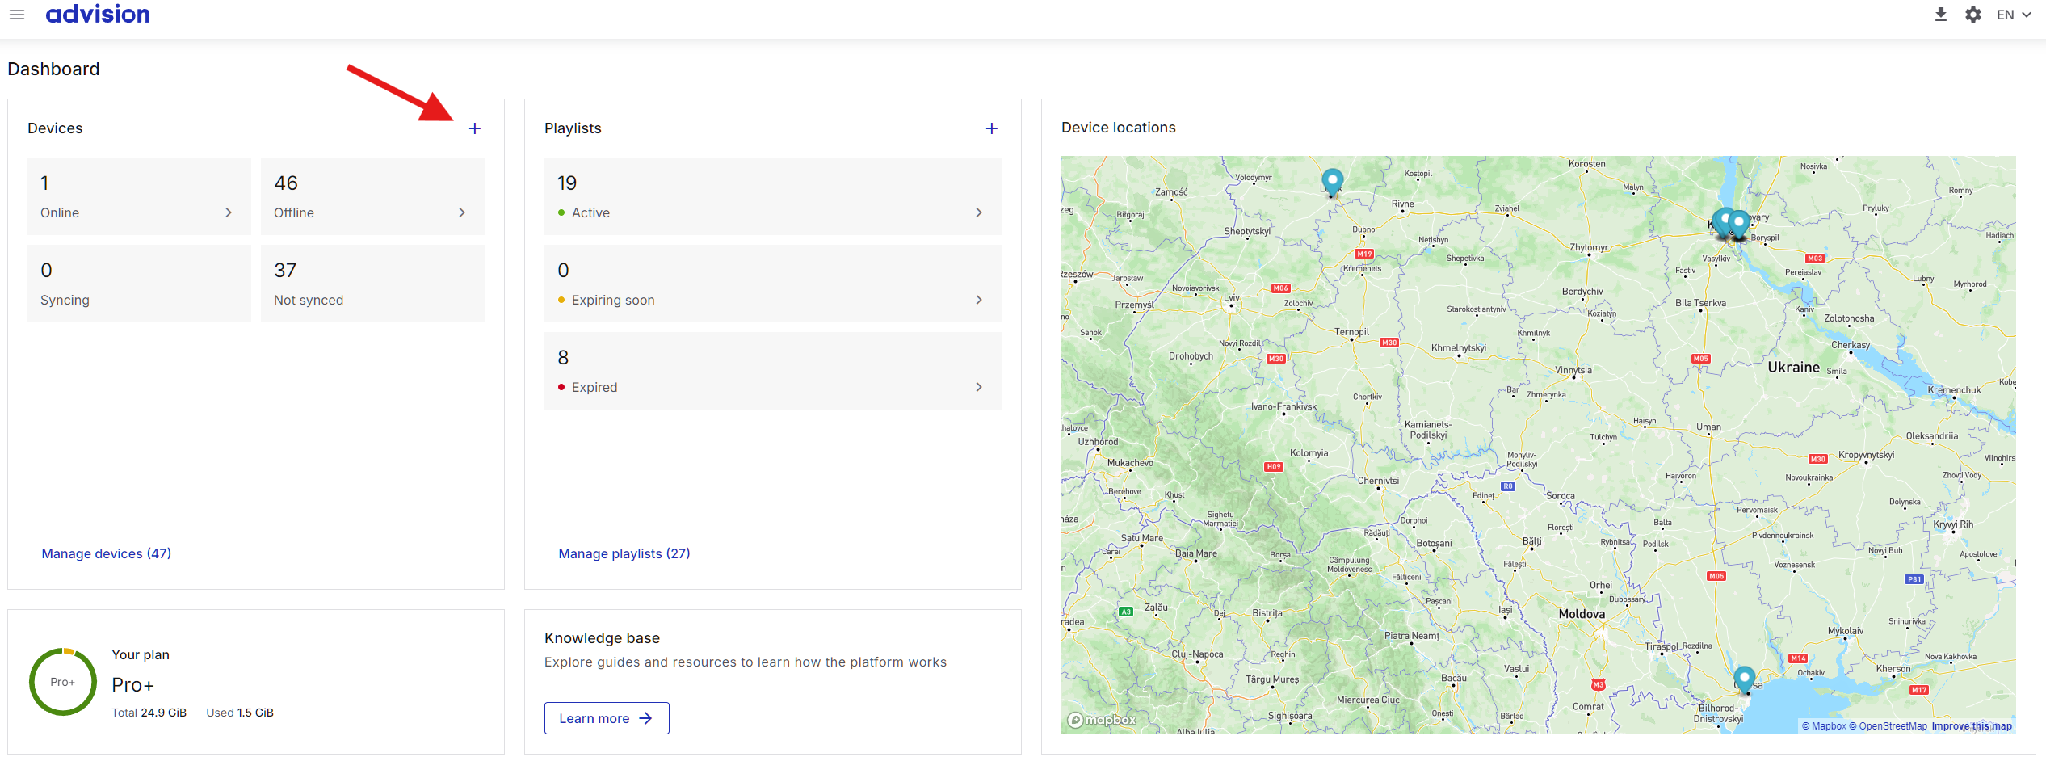
The plus button on the Devices card.
Step 1. Click the plus button on the Devices card. The Set up a new screen window opens.
Step 2. On the Download player app step, choose your platform (Windows, Linux, ARM, or Android) to download the player application, then click Next.
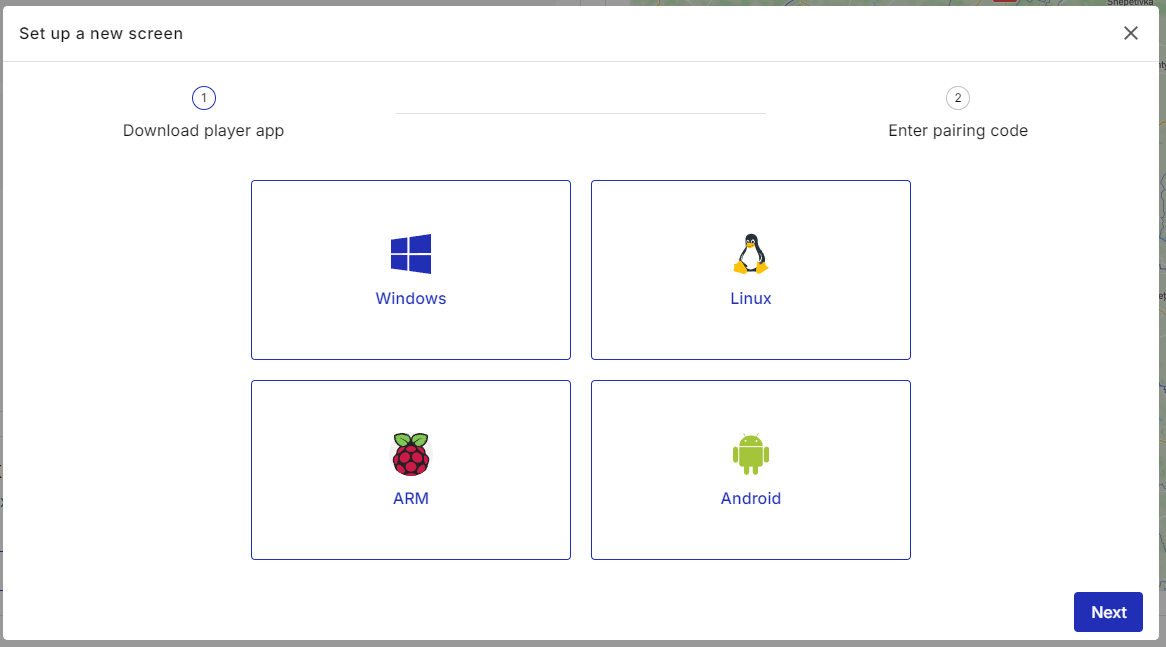
The platform selection step.
Step 3. Enter a unique screen name (optional), select the Type/License, and enter the code from your device screen in the Device binding code field, or press Scan QR code. You can skip the code and connect the device later. Click Save.
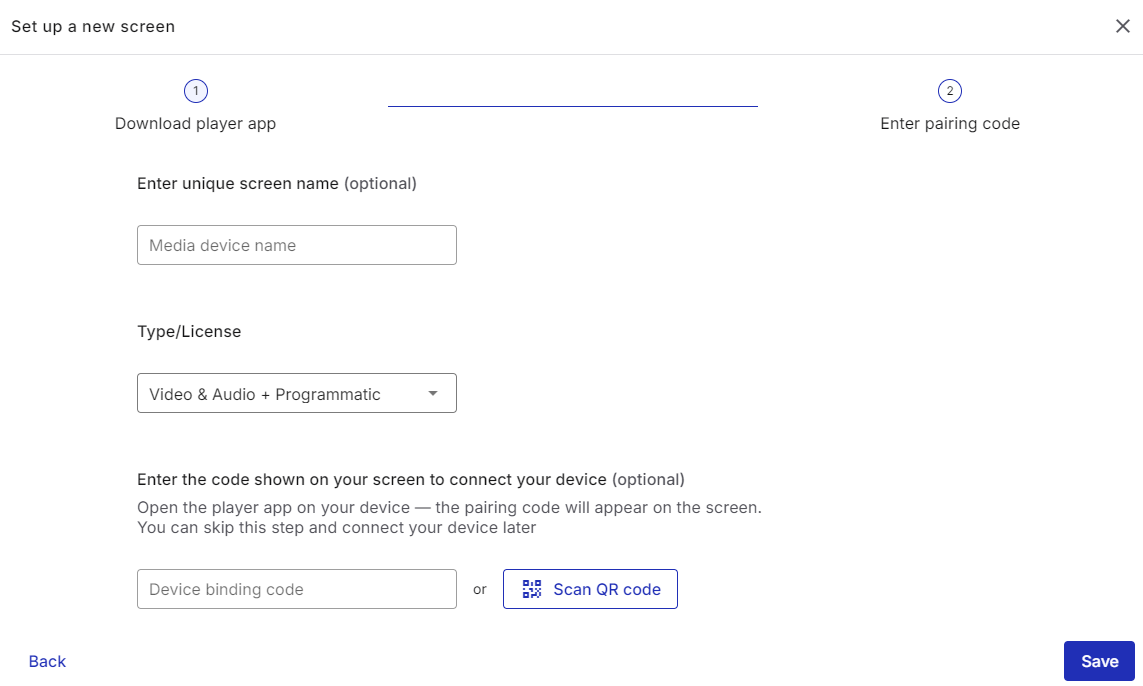
The name, license, and pairing code step.
Creating a device from the device list
Step 1. Go to the Equipment → Media devices page. It displays the full list of all devices registered on the account.
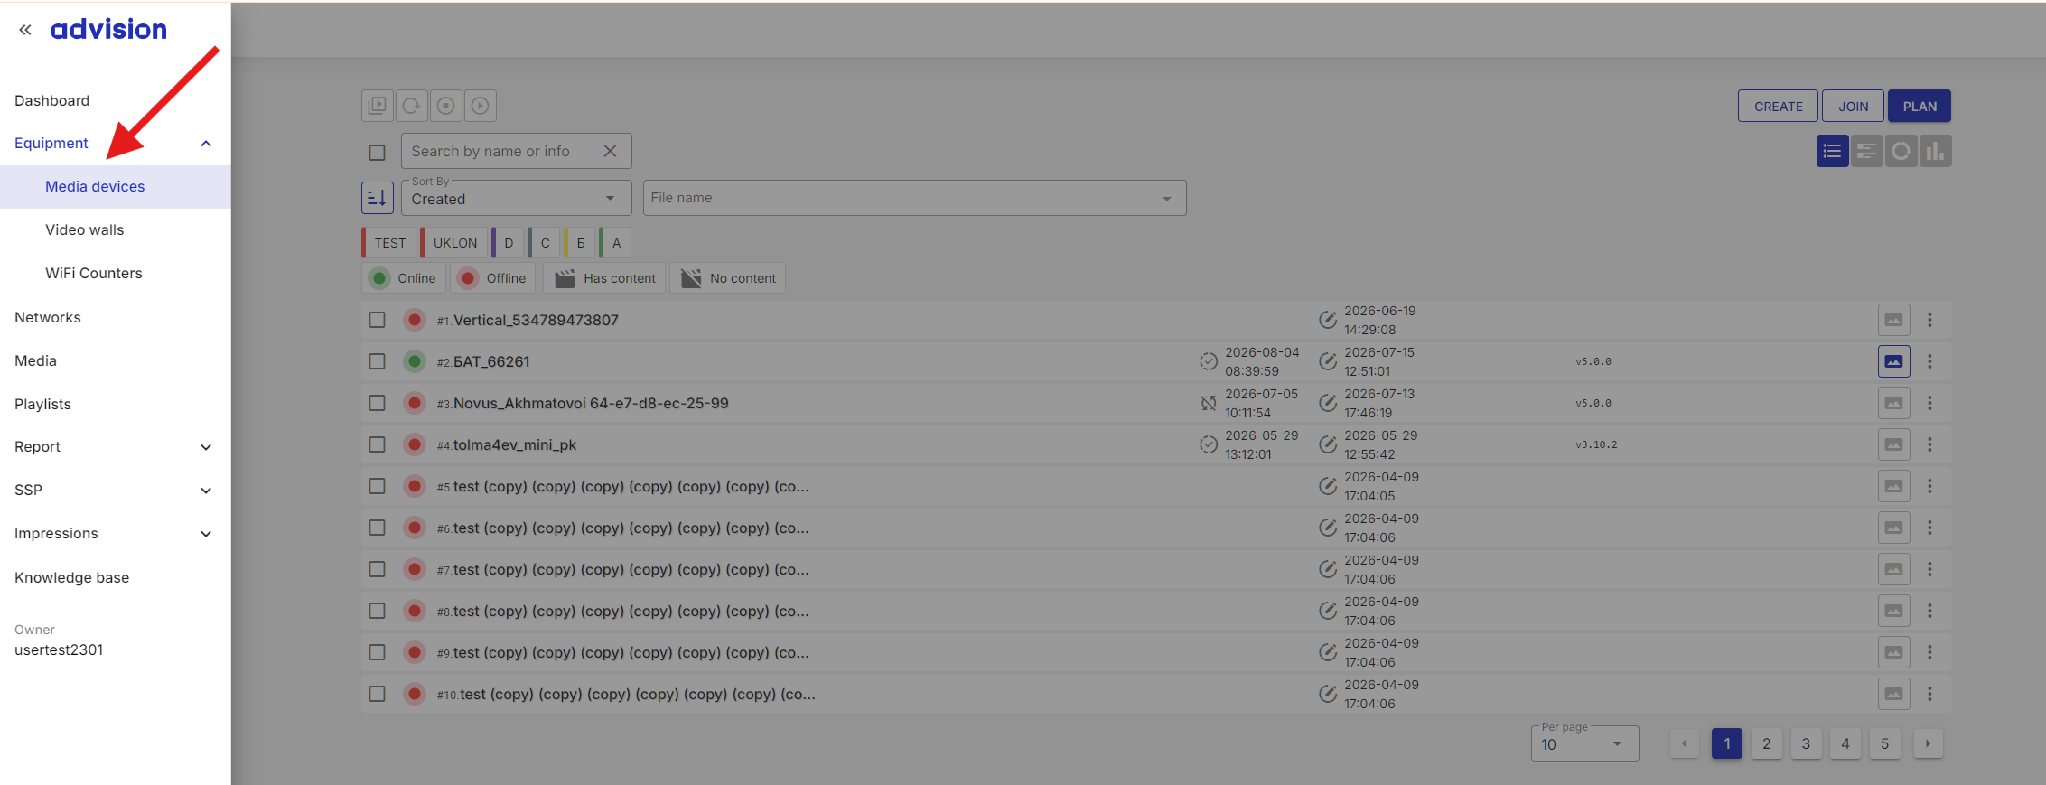
The Media devices page in the Equipment menu.
Step 2. Click the Create button in the top-right corner above the device list.
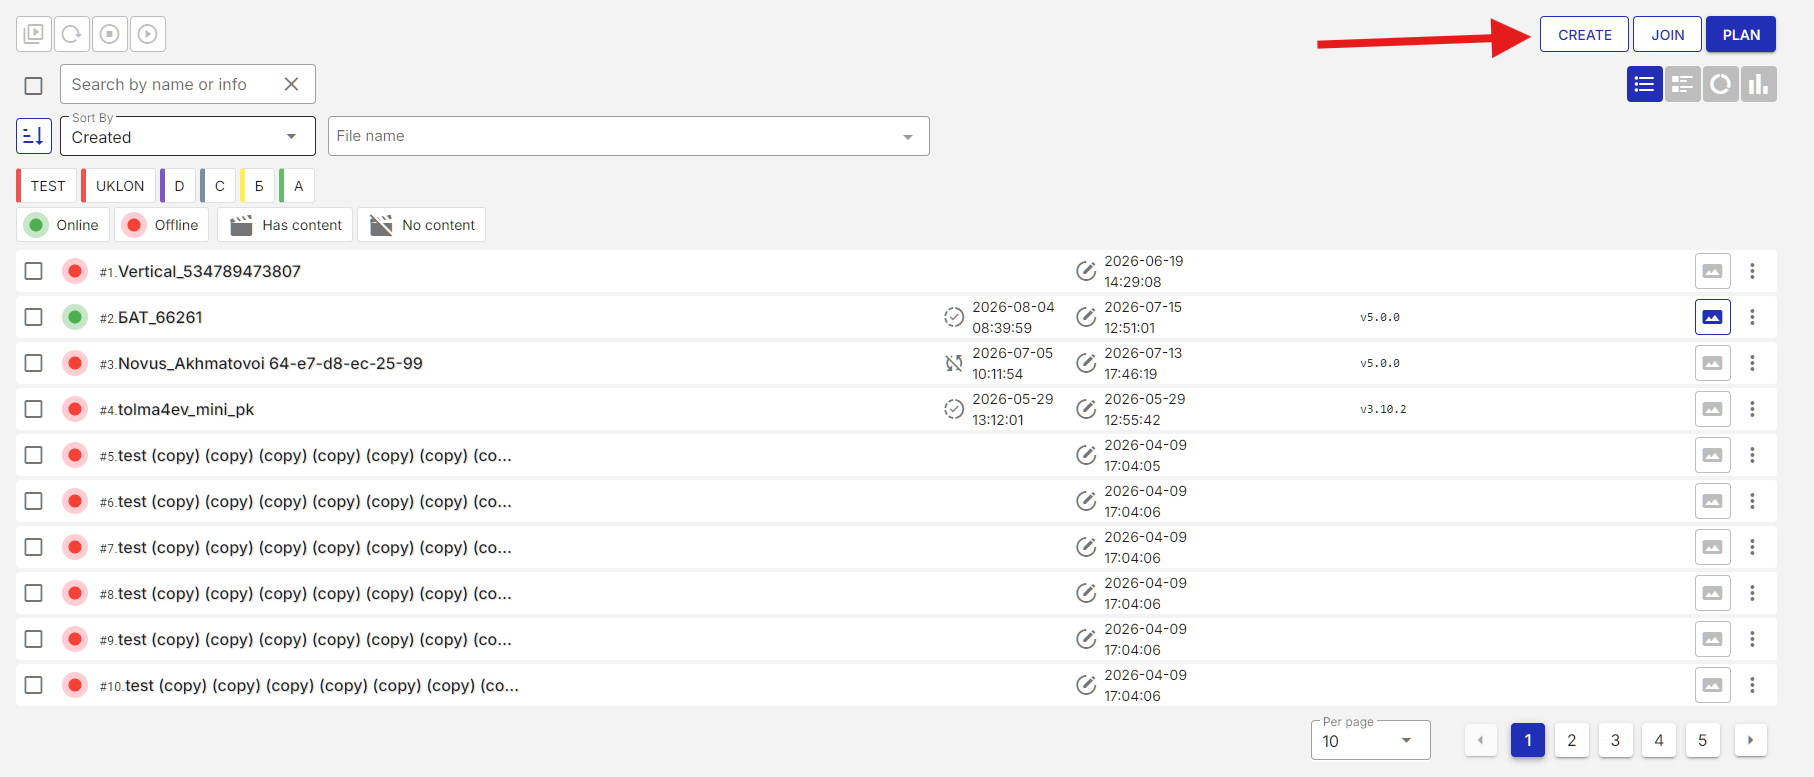
The Create button above the device list.
Step 3. In the Create device window that appears, enter the 6-digit code from the device screen, specify a name for the device, select the Type/License, and click Create to bind the device to the account.
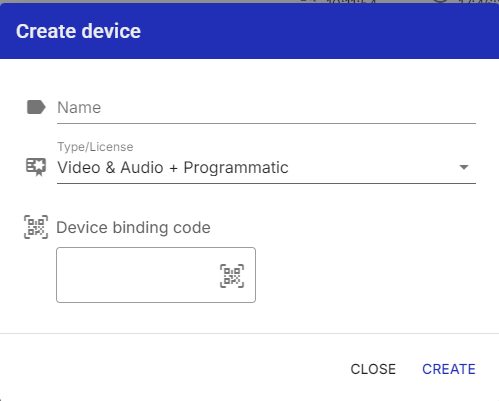
The Create device window.
The Type/License dropdown offers three options: Audio, Video & Audio + Programmatic, and Video & Audio + Programmatic + API.
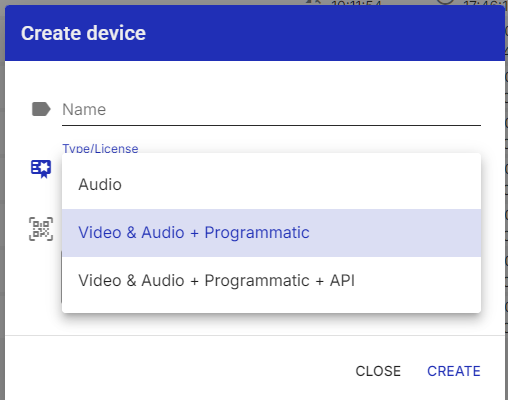
The Type/License options.
Other ways to enter the code
If the user follows the onboarding flow immediately after first login, the system creates a default device entry on the Dashboard. Clicking on this default device opens a panel with the same pairing input field, where the user can enter the 6-digit code from the player screen.
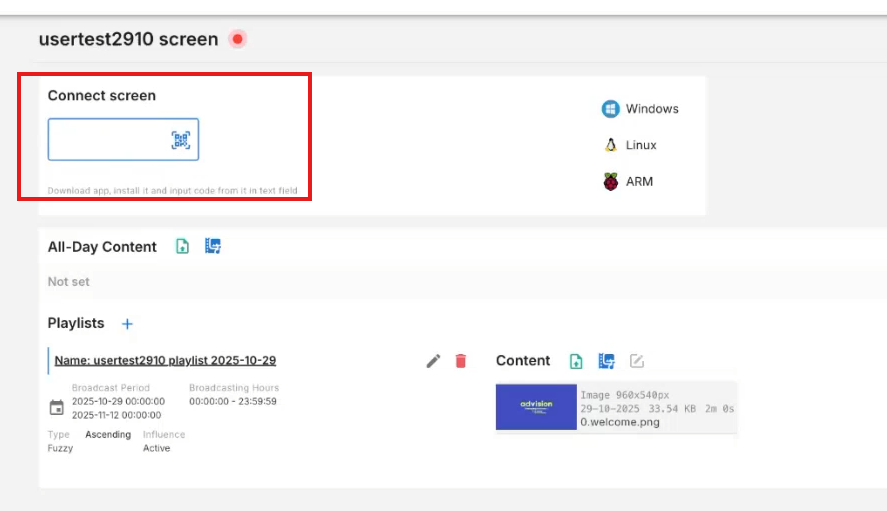
The pairing input field on the default device entry.
A device can also be added while creating a network. The Device binding code field at the bottom of the Create network dialog allows adding a new device directly to this network during creation. To use it, enter the 6-digit code that is displayed on the screen of a device running the Advision player application, or click the QR code icon to scan the code. After binding, the device is both registered on the platform and added to this network.
The device can also be paired by scanning a QR code shown on the player screen. In the setup wizard, use the Scan QR code button next to the code field; in the Create device window and the network dialog, use the QR code icon inside the code field.
After pairing
After the code is entered and the pairing is confirmed, the device connects to the platform, downloads any default content and schedules, and sends a confirmation back to the server. The device then appears in the device list with an online status indicator.
You can check the status from the Dashboard, where the Devices card shows counters for each status, or on the Equipment → Media devices page. The device list has status filter buttons: Online (green dot icon - shows only devices currently connected to the server) and Offline (red dot icon - shows only devices not connected).
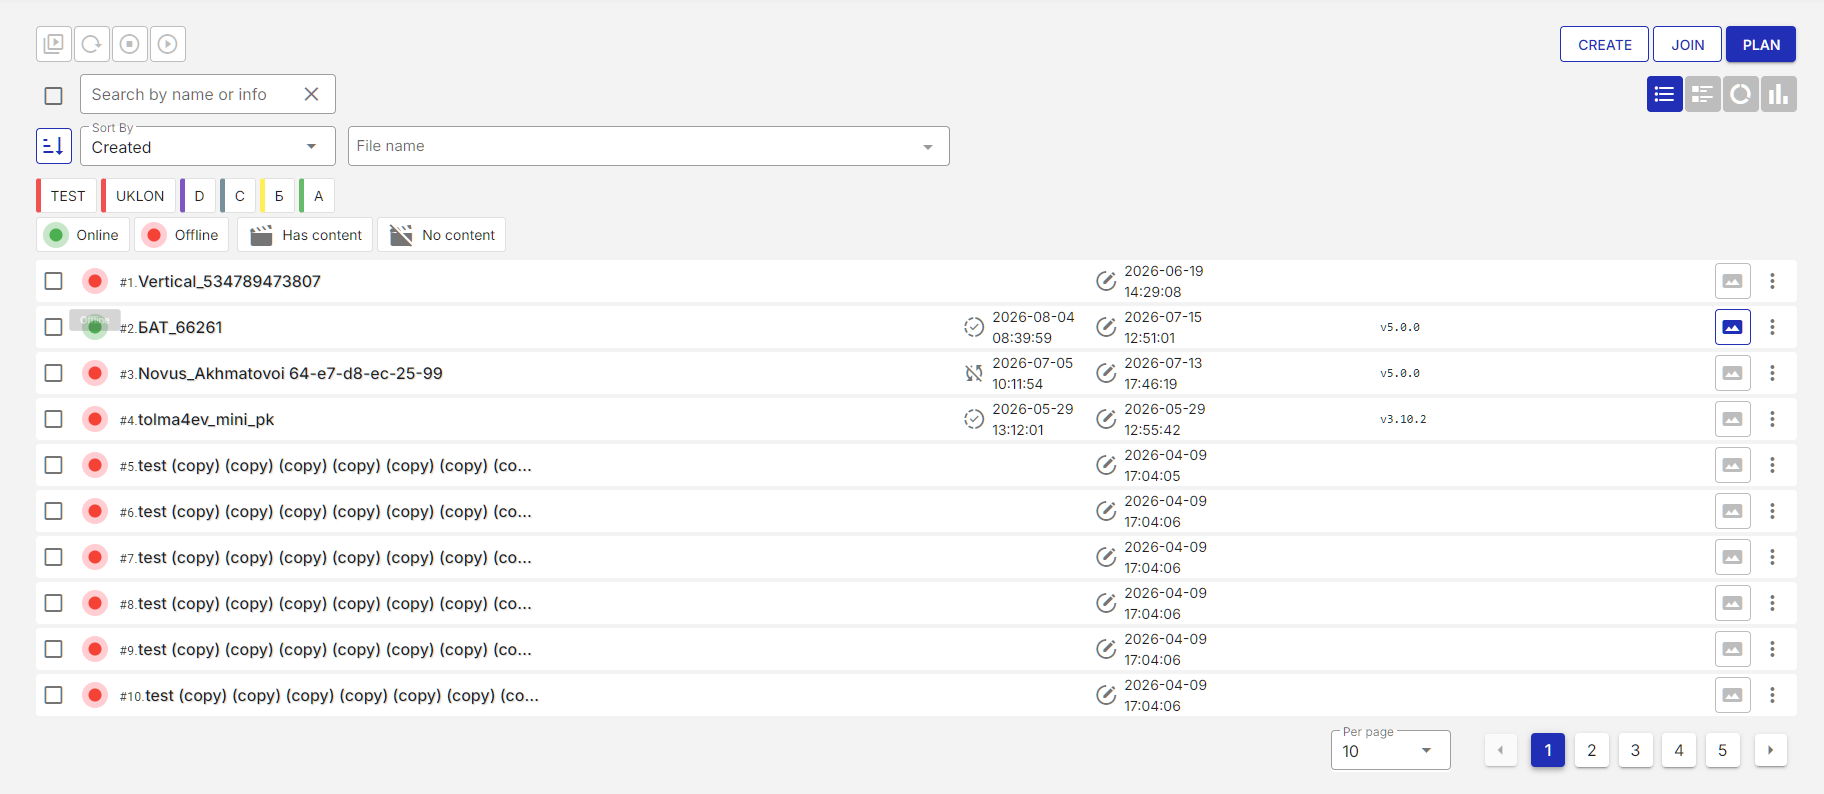
A connected device with the online status indicator.
The device is automatically added to a default network group named after the user account. If the device needs to be connected to Wi-Fi before pairing (for example, an iNEXT media player without Ethernet), follow the Wi-Fi configuration guide first. For connecting a media player to an audio amplifier instead of a screen, see the audio connection guide.
To set the device timezone, open the device page and switch to the Settings tab. The Timezone dropdown selector defines the timezone for this device. Click the dropdown to open a list of available timezones and select the one that matches the physical location of the device. All playlist broadcasting hours and broadcast periods for this device are calculated according to the timezone set here.
What's next
After the first screen is connected, upload your content - see the article "Uploading Files to the Media Library". If you have not activated your account yet, start with "Account Activation and First Login".